UIVisualEffect – Swift Tutorial
When iOS 7 was revealed at WWDC13, developers (and the rest of the world) got introduced to the new design language of iOS. The four main notions that define the new design are:
- Detail
- Deference
- Clarity
- Depth One of the ways to achieve depth in your designs is to use layering and transparency in your view hierarchy. The designers at Apple have used it extensively throughout the operating system and the stock apps. You can see it in Notification Center, UIToolbar, UIAlertController and other components. Unfortunately, last year Apple did not include an API for adding this transparent blur effect to our own apps. Now with iOS 8 there are two new UIKit classes for doing this and they come with some nice additions.
UIVisualEffect
Right now, there are only two kinds of effects - Blur and Vibrancy. Blur effects do exactly what you think they do. They blur the view they are applied to, revealing the content underneath. A blur effect can be Extra Light, Light or Dark. Vibrancy effects depend on the blur effect of the view they are added to. They are used to dynamically adjust the contrast of labels and icons, positioned on top of a blurred view, making them look sharper.
UIVisualEffectView
We use these effects by initializing a visual effect view and passing the effect as a parameter. UIVisualEffectView is a subclass of UIView, but in order for everything to work as expected, you should add subviews to its contentView.
Here is a quick example of how we could use this API to make our views more blurry and our labels more vibrant and, of course - it is all in Swift:
Blur Views
Here is the code for adding a blur view:
//Create the visual effect
//You can choose between ExtraLight, Light and Dark
let blurEffect: UIBlurEffect = UIBlurEffect(style: .Dark)

let blurView: UIVisualEffectView = UIVisualEffectView(effect: blurEffect)
blurView.setTranslatesAutoresizingMaskIntoConstraints(false)
self.view.addSubview(blurView)
This is how it looks on the iPhone 6 simulator.

We have an image for the background of the screen and a UIVisualEffectView with a dark UIBlurEffect on top.
Adding Vibrancy
Now, let’s add a text label with vibrancy effect.
let vibrancyView: UIVisualEffectView = UIVisualEffectView(effect: UIVibrancyEffect(forBlurEffect: blurEffect))
vibrancyView.setTranslatesAutoresizingMaskIntoConstraints(false)
blurView.contentView.addSubview(vibrancyView)

var label: UILabel = UILabel()
label.setTranslatesAutoresizingMaskIntoConstraints(false)
label.text = "Vibrancy"
label.font = UIFont(name: "HelveticaNeue-Bold", size: 30)
label.textAlignment = .Center
label.textColor = UIColor.whiteColor()
vibrancyView.contentView.addSubview(label)
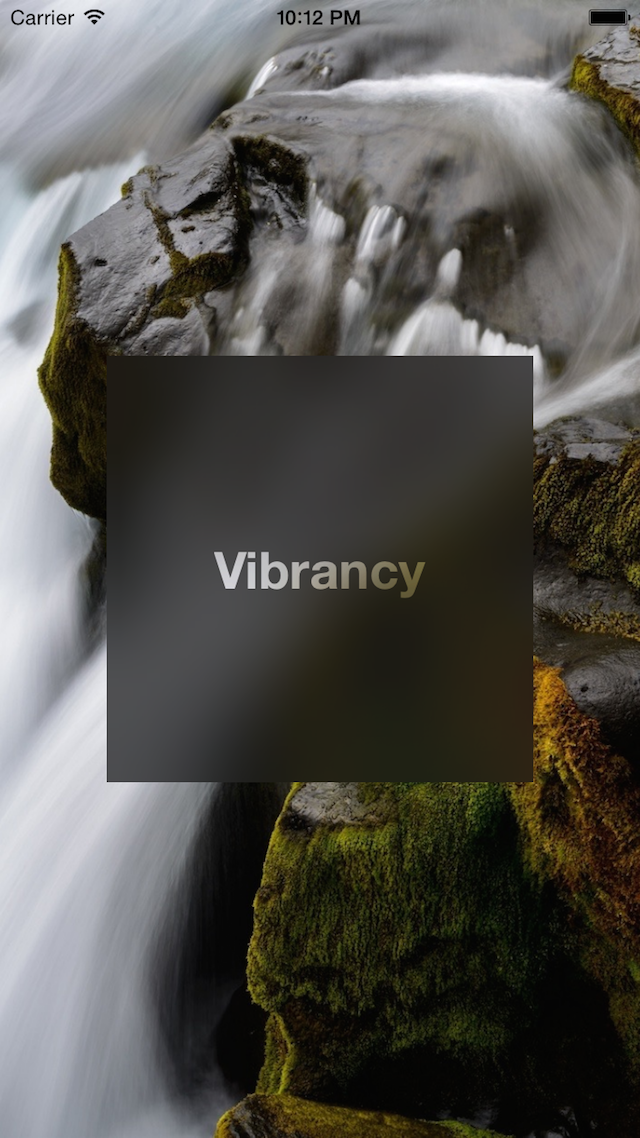
First we create a UIVisualEffectView with UIVibrancyEffect and add it as a subview of the blur view. Next, we create the UILabel and just add it to the contentView of the vibrancy view.
And here is the result:

Vibrancy effects are used on the lines and labels in the iOS Notification Center. However, there is no way to access the blur effect of the background. Thankfully, there is a special class method that will create the effect for you and if you are developing a Today widget you should use it. class func notificationCenterVibrancyEffect() -> UIVibrancyEffect!
You can find the example source code on GitHub.
Follow me on Twitter for more posts like this one.