UIAlertController – a Swift Example
The biggest news for iOS and OS X was definitely the unveiling of Swift, but in addition to that, Cocoa Touch received a major update. As a result, some of the old APIs are being removed in order to make way for the many new additions to the framework.
Starting from iOS8, UIActionSheet and UIAlertView are being replaced by the new UIAlertController.
An instance of the UIAlertController can be presented modally on screen just as any other UIViewController using the presentViewController:animated:completion: method. What makes the UIAlertController instance differentiate between working as an ActionSheet or as an AlertView is the style parameter you pass when creating it.
No more delegation
If you have used a UIActionSheet or UIAlertView, you know that the way to get a callback from it is for a class (in most cases the ViewController) to implement the UIActionSheetDelegate or UIAlertViewDelegate protocol. There are some open source projects that replaced this delegation pattern with block based callbacks, but the official APIs were never updated. UIAlertController does not use delegation. Instead, it has a collection of UIAlertAction items, that use closures (or blocks if you are using Objective-C) to handle user input.
Demo Time
In order to try out UIActionController, just create a new Single View Swift Xcode project. Add two buttons to the screen and connect actions to them.
Action Sheet
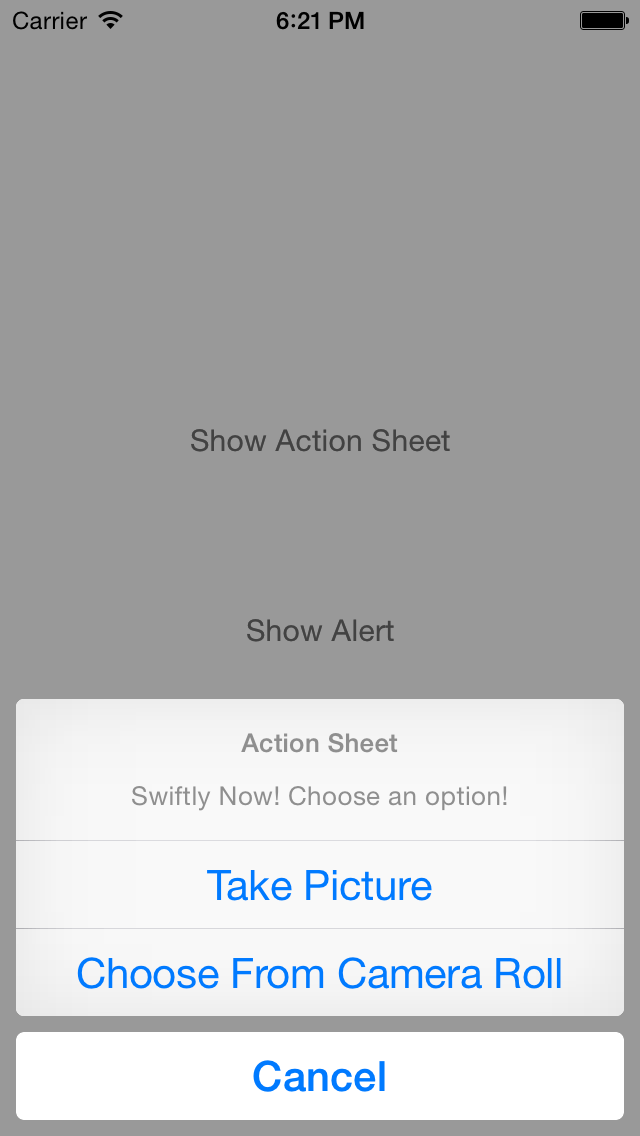
Let’s start off with the action sheet example. We will create an instance of UIAlertController and add three actions to it - Cancel, Take Picture and Choose From Camera Roll.
@IBAction func showActionSheetTapped(sender: AnyObject) {
  //Create the AlertController
  let actionSheetController: UIAlertController = UIAlertController(title: "Action Sheet", message: "Swiftly Now! Choose an option!", preferredStyle: .ActionSheet)

  //Create and add the Cancel action
  let cancelAction: UIAlertAction = UIAlertAction(title: "Cancel", style: .Cancel) { action -> Void in
    //Just dismiss the action sheet
  }
  actionSheetController.addAction(cancelAction)
	//Create and add first option action
  let takePictureAction: UIAlertAction = UIAlertAction(title: "Take Picture", style: .Default) { action -> Void in
    //Code for launching the camera goes here
	}
  actionSheetController.addAction(takePictureAction)
  //Create and add a second option action
  let choosePictureAction: UIAlertAction = UIAlertAction(title: "Choose From Camera Roll", style: .Default) { action -> Void in
    //Code for picking from camera roll goes here
	}
  actionSheetController.addAction(choosePictureAction)

  //Present the AlertController
  self.presentViewController(actionSheetController, animated: true, completion: nil)
}
And here is our result:
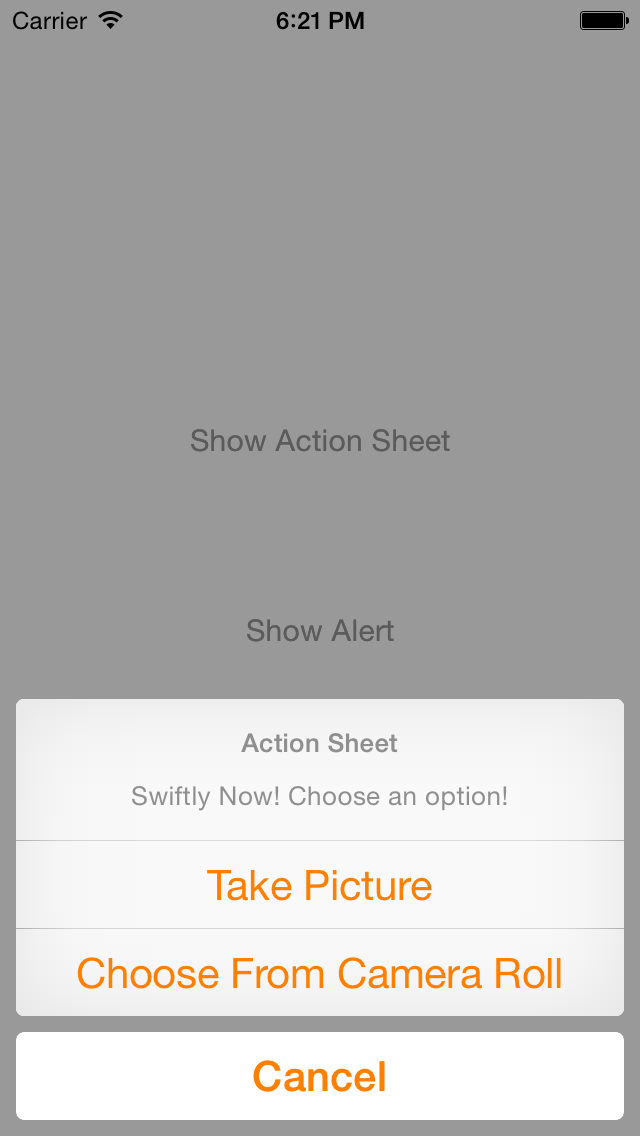
A nice improvement to the new UIAlertController is the ability add tint to it. If, for example, the theme color of your app is orange, you can put the following line in your AppDelegate.swift file:
self.window?.tintColor = UIColor.orangeColor()
This will tint most of the interactive UI elements of your app with the color that you specify.
Here is how our orange tinted action sheet looks like:
Alert View
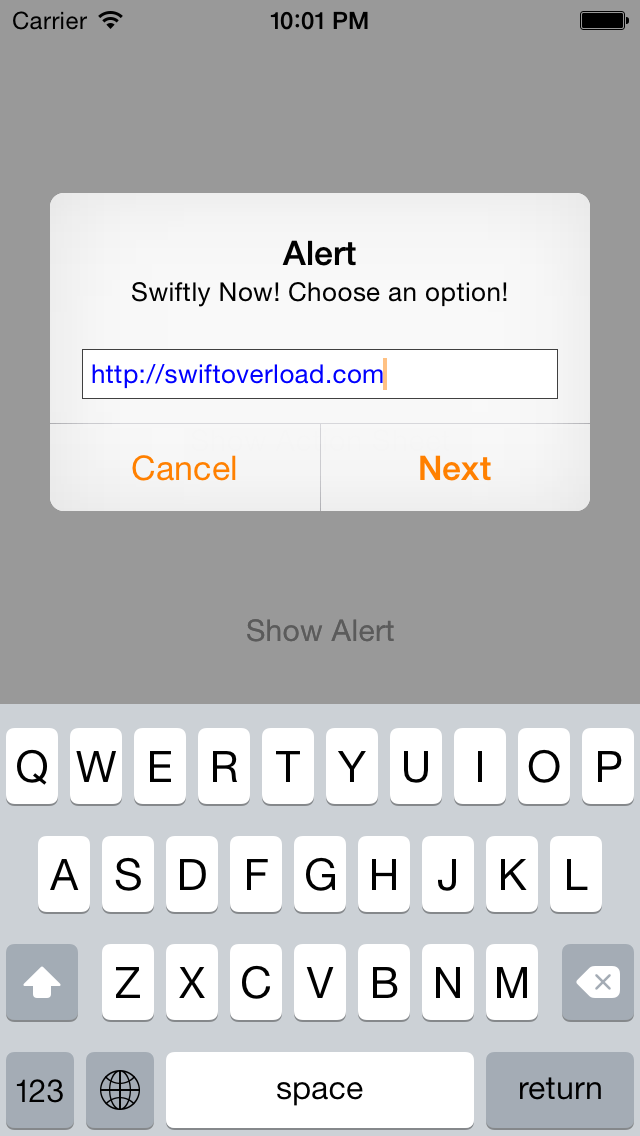
And now for the alert view example. The code is pretty much the same (which is great!), except for the .Alert value for the style parameter and the fact that we can add UITextField components to the alert view. We have a designated closure parameter that lets us customize the text input field.
@IBAction func showAlertTapped(sender: AnyObject) {
  //Create the AlertController
  let actionSheetController: UIAlertController = UIAlertController(title: "Alert", message: "Swiftly Now! Choose an option!", preferredStyle: .Alert)

  //Create and add the Cancel action
  let cancelAction: UIAlertAction = UIAlertAction(title: "Cancel", style: .Cancel) { action -> Void in
    //Do some stuff
	}
  actionSheetController.addAction(cancelAction)
	//Create and an option action
  let nextAction: UIAlertAction = UIAlertAction(title: "Next", style: .Default) { action -> Void in
    //Do some other stuff
	}
  actionSheetController.addAction(nextAction)
  //Add a text field
  actionSheetController.addTextFieldWithConfigurationHandler { textField -> Void in
	   //TextField configuration
     textField.textColor = UIColor.blueColor()
   }

   //Present the AlertController
   self.presentViewController(actionSheetController, animated: true, completion: nil)
}
This is how this looks like on the screen:
The new way of presenting action sheets and alerts makes your code much more flexible and compact. It also gives you more ways to customize your UI. The UIAlertController API is an example of how Apple motivates developers to address different devices and use cases with one universal codebase. Right now, the styles that we can choose from are only .ActionSheet and .Alert, but in future versions of the iOS SDK, we may have more options.
You can find the project with the sample code here.
Happy coding!